Sorry, this product is currently unavailable
Alternative products you may be interested in:

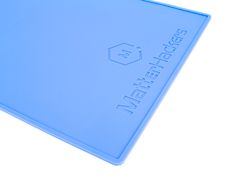


MatterHackers LayerLock SLA Resin 3D Printing Build Surface for AnyCubic Photon X (Pack of 1)


LayerLock SLA Build Surface is a thin build surface with an adhesive backing that is engineered to take the guesswork out of getting printed parts to stick to the plate and minimizing warps. It is compatible with most photopolymer resin brands and types, and is designed to ensure that the print object will stick to the build surface throughout the entire print session.
- Adhesive backing guarantees bed adhesion throughout print
- Compatible with most photopolymer resins
- Minimizes warps for successful prints
For tips on installing this build sheet, check out the How to Succeed with LayerLock SLA Build Surface article.
Enhance your 3D printing experience with LayerLock SLA Resin 3D Printing Build Surface! This awesome build sheet is engineered to take the guesswork out of getting those printed parts to stick to the plate and minimizing warps. Compatible with most photopolymer resin brands and types such as MH Build Epoxy-Free Resin, this thin build surface with an adhesive backing guarantees the print object will stick to the build sheet throughout the entire print session. Invest in this reliable build surface for consistent bed adhesion. Note that LayerLock SLA sheets do not arrive pre-sanded. Please pre-sand the build surface before use.

SUCCESSFULLY PRODUCE RESIN PRINTED PARTS WITH LAYERLOCK SLA BUILD SURFACE
LayerLock SLA Build Surface is the ideal choice when 3D printing with photopolymer resins. Like FDM, SLA 3D printing is also susceptible to bed adhesion issues that may be caused by a variety of factors. With LayerLock, the amount of guesswork and hoops to jump through in resolving adhesion issues is drastically reduced thanks to LayerLock's formula and design. Tired of parts dropping into the vat or warping at the base due to lack of bed adhesion? LayerLock SLA Resin 3D Printing Build Surface is the solution for you.

SAVE MONEY AND MATERIAL WITH THIS RELIABLE PRINT SURFACE
More successful 3D printed parts equal less money and material loss from failed bed adhesion. LayerLock SLA Resin 3D Printing Build Surface was designed to ensure digital fabricators make the most out of their 3D printing experience by achieving a higher print success rate with every project. Like the rest of MatterHackers' LayerLock line, this SLA-specific build surface was engineered to deliver reliable bed adhesion to 3D printing. No more having to reprint the same part due to the model falling off the plate mid-print or the base warping on a part that must be flat, make the most out of your photopolymer material using LayerLock SLA Resin 3D Printing Build Surface.

THE BEST SOLUTION TO ACHIEVING BETTER BED ADHESION WITH AN EASY-TO-INSTALL BUILD SHEET
Getting parts to stick to your resin 3D printer's build platform is easier and better with LayerLock SLA Resin 3D Printing Build Surface. Simply remove the adhesive liner on the back of this LayerLock sheet, stick it onto the clean surface of the printer's build plate, and voila–the build platform now has minimal chances of prints failing due to incomplete bed adhesion. While there are other methods to achieving better bed adhesion, LayerLock is the best solution all around. Sanding the printer's build plate is a common option to improve adhesion and is super effective; however, there's a valid concern about potentially harming the build plate (and your printer's warranty) if sanding is done improperly. With LayerLock SLA Build Surface, there is zero concern about ruining the build plate as any needed sanding happens on the LayerLock sheet. This saves the resin printer's warranty and saves you from having to spend extra cash on a new build plate due to uneven and/or very frequent sanding. For the best and easiest solution to achieving strong bed adhesion, look no further than LayerLock SLA Resin 3D Printing Build Surface.

AVAILABLE LAYERLOCK SLA RESIN 3D PRINTING BUILD SURFACE SIZES
| Dimensions | New Spacer Needed? | Printer Compatibility |
|---|---|---|
| 5.039" x 3.09" (128mm x 78.5mm) |
|
|
| 7.598" x 4.76" (193mm x 121mm) |
|
|
| 10.43" x 5.866" (265mm x 149mm) |
|
|
| 13.149" x 7.559" (334mm x 192mm) |
|
|
TECHNICAL SPECIFICATIONS
- Pack of 1
- 1 x Thin Build Surface Sheet with an Adhesive Back
- Thickness: 0.035" (0.89 mm)
- 1 x Square of 220g sandpaper
- 1 x Thin Build Surface Sheet with an Adhesive Back
- Pack of 3
- 3 x Thin Build Surface Sheet with an Adhesive Back
- Each Sheet's Thickness: 0.035" (0.89 mm)
- 1 x Square of 220g sandpaper
- 3 x Thin Build Surface Sheet with an Adhesive Back
MATERIAL COMPATIBILITY
Compatible with most photopolymer resin brands and types such as MH Build Epoxy-Free Resin, Peopoly, Liqcreate, and more.

LAYERLOCK SLA BUILD SURFACE TIPS
- Using the correct resin profile settings and having a leveled Z height is still necessary for bed adhesion success. Make sure to calibrate your Z height after installing this surface on your machine.
- LayerLock SLA sheets do not arrive pre-sanded. Lightly scuff the build surface before first use with the 220g sandpaper that comes with this surface. Scuff again whenever you notice the adhesion has worn off. Scuffing the surface will most likely be necessary after every couple of Liters of resin used.
- Maximize the lifespan of your build surface with proper care/maintenance.
- Avoid jabbing sharp print removal tools into the build surface
- Prevent solvents like IPA from making contact with the adhesive that attaches the build surface to the build plate. This means soaking your build plate with the LayerLock SLA sheet attached for long periods of time is not recommended as it can reduce the longevity of that adhesive.
- Using IPA to wipe the surface of the LayerLock SLA sheet is fine.

INSTALLATION
Installation is simple and easy. Lightly scuff your build plate and lightly sand the LayerLock build sheet. Clean both your build plate and LayerLock sheet with isopropyl alcohol. Once the plate is dry, remove the adhesive liner on the back of the LayerLock build surface sheet, place the sheet (adhesive side facing up) on top of the LCD screen, home your Z, and that will stick it onto whatever build plate is installed on your specific printer.
- If you are attaching the sheet directly to the printer's build plate, no additional steps are needed as the standard recommendation of loosening the leveling screws before homing your Z height will suffice.
- If you are attaching the sheet onto a Wham Bam system, make sure you follow Wham Bam's instructions for installing a new spacer (if applicable to your machine) if you are installing both the Wham Bam system and LayerLock SLA sheet at the same time.
- If you already have the Wham Bam system and new spacer installed on your printer, no additional steps are needed as the standard recommendation of loosening the leveling screws before calibrating your Z height will suffice.
Once stuck to the build plate, re-level your surface based on your specific printer/setup with the newly installed LayerLock SLA Build Surface and the Z height is properly set. Whether it's the printer's build plate or a flexible build plate that's part of a magnetic bed system, this LayerLock SLA Resin 3D Printing Build Surface is compatible. Thanks to LayerLock SLA sheet's 0.8mm thin thickness, adjustments to your z-height will be minor. That's it! You're ready to print.
If removing LayerLock SLA Build Surface to install a new sheet, ensure to remove any leftover adhesive on the build plate before installing a new sheet.
Want step-by-step instructions on installation? Check out the 'How to Succeed with LayerLock SLA Build Surface' article here.
MAINTENANCE
If bed adhesion is lost, use the 220 grit sandpaper provided to lightly sand the build sheet. It is best to sand the entire surface evenly to avoid creating low spots. Avoid inhaling dust particles from sanding by wearing a respirator mask. Wipe the dust off the sheet before printing. If cleaning the build plate is needed (for example, when switching between formulas/colors), avoid bathing the sheet in solvents (such as isopropyl alcohol), if possible. Cleaning the LayerLock print surface with solvents via bathing in a container of that solution may shorten the lifespan of the build surface's adhesion to the build plate. Cleaning the surface with solvent using a paper towel of micro fiber cloth and a minimal amount of solvent is fine.