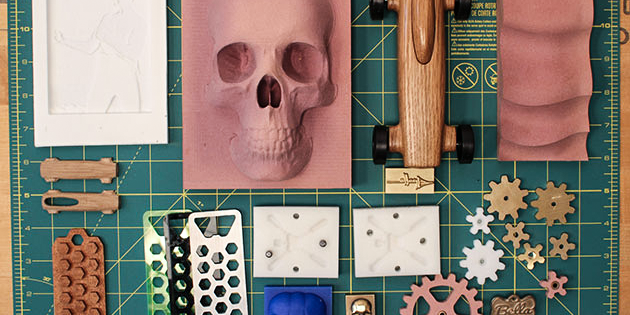
Digital Fabrication Anatomy: Desktop Milling
Often simply called CNCs, desktop mills are small machines that remove material to create a finished part. Read on to see some of the different parts of them.

Before 3D printers were even a thought, there were CNCs. These were huge room-sized machines designed supplement the manufacturing process, starting as a research endeavor for MIT in the late 50s. Nearly sixty years since the first CNC, the accessibility of the technology has meant a miniaturization of CNCs and optimization for small-scale production and prototyping, making desktop milling a possibility.
Depending on who you talk to, desktop milling can go by many different names; 3D carving, CNC milling, CNC Routing, or even Benchtop milling. In practice, they all mean the same thing: the machine is small enough to fit on a desk and can cut a variety of materials to make parts. Desktop mills work by clamping some material to their work surface and using a spinning router bit, carves away material until the desired shape is left behind.
Spindle vs. Router
Depending on the actual model of machine, it may use a spindle that has software controlled speed adjustment, like the Carbide Nomad, or it can use an off-the-shelf hardware tool, like a Dewalt or Makita router. The Inventables X-Carve uses one of these routers, whereas the Carbide Shapeoko used to use a router, they have instead moved toward one designed by Carbide. The difference here is that these hardware tools have an on-off button on the housing, and a speed dial for adjustments.
Form Factor
In general, desktop mills have two different formats: small and enclosed, or large and open. In terms of material capabilities and resolution, both formats are equally capable, with the biggest difference being their setup and build volume.
Small and Enclosed Mills
The Carbide Nomad or the Zmorph are some examples of desktop mills you could easily unbox, setup at your desk or on your workshop bench, and get started. They come fully assembled, so all you need to worry about is the software setup, which thanks to the included software they are already tuned and ready for the specific machine.
Large Format Mills
The Inventables X-Carve and the Carbide Shapeoko are large format mills that will need some consideration for setup. These are larger than most desks, and by design are not enclosed, so a dust management system is key here. To make things easy, there are dust shoes designed for them that attach to the milling head to extract most of the dust created by the milling process. And they’re kits as well, so unboxing them is easy, but the setup will take some time to assemble everything.
Clamps and Fixtures
There’s also different ways to hold the workpiece onto the desktop mill: a threaded baseplate for easy clamp readjustment, double sided tape, a T-track and clamp add-on set, or even fixturing wax, which is a wax you melt onto the workpiece and stick to the desktop mill for clampless milling or to prevent adhesive from the double sided getting on the bit.
Carving Bits
For the actual milling, there are a lot of options for what you can use. The collets are standard sizes, so you just need to find a matching router bit and you can run with it. There are many different shapes and styles of bits, but the most common are going to be your end mills: bits with a specific shape at the end of it like a flat endmill, ball-endmill, or fishtail endmill. And because you can change out the bits very easily, the resolution of your parts is limited only by the size of your bit which means that putting in a smaller bit will get you finer detail at the cost of slower milling times.
Accessories
Depending on the project, there are add-on accessories that can make a huge difference in the success of an idea, like the Carbide Flip Jig. It allows you to carve one side of your workpiece, flip it over, and continue milling the backside of it, without fear of any offsets that would cause a very noticeable seam on the sides.
Material Capabilities
While wax, woods, and plastics are very easy for these to cut through, metals are possible but will take a little more finesse to get them to work properly. Soft metals like copper, brass, and aluminum are the extent of the milling capabilities for these machines, and even so you are going to be milling significantly slower than a wood project to get a nice finished edge.
Supplied Software
The included software for most desktop mills is going to have a focus on the first-timer; basic shapes and design elements can be used to create custom designs that are limited to 2.5D (length, width, and height is limited to planes), but for the power-user, they allow for you to import Gcode from external software and run those instead. If you have an industrial level CAM software or are well versed in Fusion360, you can create your entire model’s Gcode there and export a fully 3D mill like a dome, or any complex shape without overhangs.
A desktop mill is a fantastic addition to your toolset when you need to prototype future products or begin creating your small-scale production line. In fact, we got into desktop milling because we needed a way to make prototype carriages for our 3D printer, Pulse. I hope this video has given you some insight into what desktop milling has to offer you and your endeavors, because these are some really cool machines.
I’m Alec from MatterHackers thanks for watching!