How To: Understand the Basics of Thermoforming
Thermoforming is a manufacturing process completely different from 3D printing and has its own workflow. Take a look at what you need to know before getting started.

Much like 3D printing, getting started with thermoforming has its own nuances, tricks, and workflow that takes some getting used to. Even across the various forms of 3D printing, the workflow is different; some can handle complex overhangs, geometry, and things like internal cavities, but models for thermoforming need to be a lot simpler than that. Thanks to this article, you will have a much better understanding of how thermoforming works, what you need to consider, and some ideas of how to utilize it best.
How it works and some definitions:
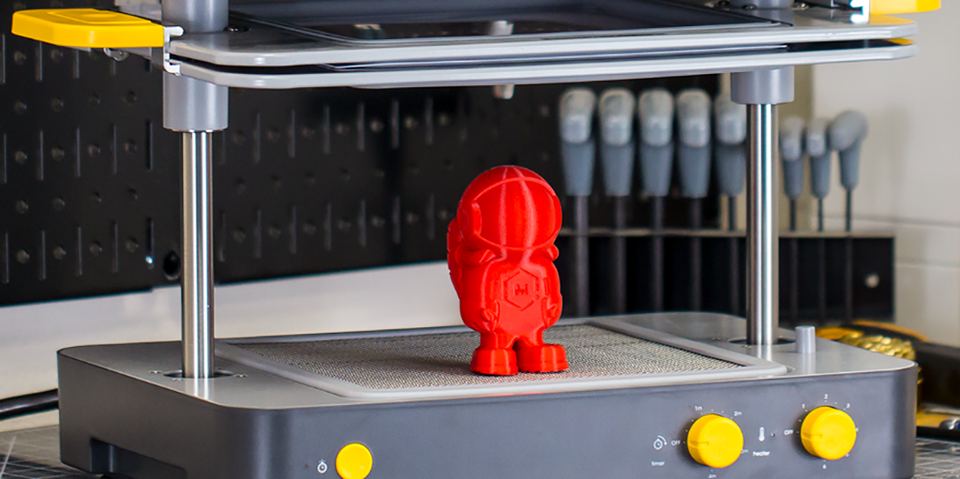
Thermoforming is different from other types of molds in that you aren’t trying to create a 1:1 replication of an object, just a close approximation. A thermoformer will clamp onto a sheet of plastic and heat it until malleable and it starts to droop. At that point, the plastic and clamping mechanism will be lowered onto a forming buck, or master, and suction is applied to pull out the air trapped underneath the plastic, just like pulling the air out of a plastic bag using your mouth. Some thermoformers used large vacuum tanks that pull all the air at once, while home and consumer thermoformers use household vacuums due to their ease of use and having plenty of suction for small scale parts.
The construction of the part that the forming buck rests on, or platen, can vary. Some look like pegboard with a grid of holes spread all across the platen, while others utilize a mesh placed over the top of the platen with one hole in the center of it.
Making Forming Bucks:
Unlike other forms of moldmaking like silicone molds, you are limited in the types of geometry that are able to be reproduced by a thermoformer. There’s three rules to remember:
- No undercuts. Your model needs to taper with its smallest cross section at the top and the largest at the base. Any sort of undercut will be hard to remove at best, or trap your model at worst.
- Add draft angles; no completely vertical walls. When you’re trying to remove your forming buck, if you have completely vertical walls, you will be fighting against that suction force the entire time, like pulling a full garbage bag out of a trash can. Keep any vertical walls at least at a 3° angle to give you relief as soon as you pop the part out even a little bit.
- Add air channels. Any sort of inner surface like a dish will present problems as soon as you turn the vacuum on; once suction is applied, the edges will seal and you won’t be able to get the air out of the center cavity. By adding a simple hole all the way through the center cavity, you allow air to flow out of the hole and are left with a small dimple the size of the hole.
Examples of Thermoforming:
You may not realize it, but many products all around you are thermoformed. From things like packaging to sleds to costumes, it’s a really cheap and effective way to make a product and depending on your intent, you can use the thermoformed plastic as a mold or as the usable part.
- Most of the worn props in the original Star Wars were thermoformed like any of the Rebel helmets, all of the Stormtroopers’ armor, TIE pilots, Darth Vader, etc. It was the most time and cost effective way for Lucasfilm to create several dozen sets of armor.
- Toys use “bubble packaging” to both display the figure and keep them from flopping around inside the box. In the past it was really simply done with the same size plastic shell for every character adhered to a cardboard back, while today they involve holes to use twist ties to hold down figures, a form fitting depression in the plastic, and little nubs to retain the figure.
- A local craft store has a mold making section and they have dozens of different molds for plaster, resin, clay, and soap, and they’re all made from thermoformed plastic. Sure the finished product may have some round edger (a natural artifact of thermoforming) but you can quickly pour, let it harden, remove, and reuse the mold.
Once you’ve got the hang of it, thermoforming can get very addicting; you’ll be scrambling to find the next thing you can stretch plastic over and create something totally new. Whether it’s some soap molds, packaging for your newest project and product, or part of your latest cosplay or prop, a thermoformer is a great addition to your toolset.
Request a Quote
To learn about available discounts, training, and maintenance options, please use the form below and a MatterHackers Expert will contact you within one business day. Alternatively, you can always feel free to give us a call at +1 (800) 613-4290 or email sales@matterhackers.com.