How To: Use the Polysher for Authentic Props and Models
Expand your creative prop building capabilities with added levels of realism using the Polymaker Polysher 3D Print Finisher.

I’ve said it many times by now, my interest in 3D printing was sparked from cosplay. Having to sculpt props by hand or glue paper together and coat it in fiberglass to stiffen it was the best tools I had available to me. It’s a time intensive and potentially noxious process, but with a 3D printer I was able to rapidly decrease my time spent on each individual piece, since I could have the bulk of the work being printed, and while that’s happening, I could be finishing previous prints by sanding, filling, and priming as described here. Sanding still takes time, but at least I was able to knock out a huge chunk of the process. From here I considered moving from PLA to ABS, but at the time it seemed like more hassle than it was worth to acetone vapor smooth my prints. Enter: The PolyMaker Polysher.
Now, the Polysher doesn’t use acetone to smooth ABS 3D prints, it uses isopropyl alcohol to smooth PVB 3D prints. PolyMaker has a special line of filament, PolySmooth, that is specially formulated to be reactive with isopropyl alcohol and it works really well and is really cool to watch.
Materials
- Polysher
- PolySmooth
- Isopropyl alcohol
- Paper towels
Picking the right 3D print
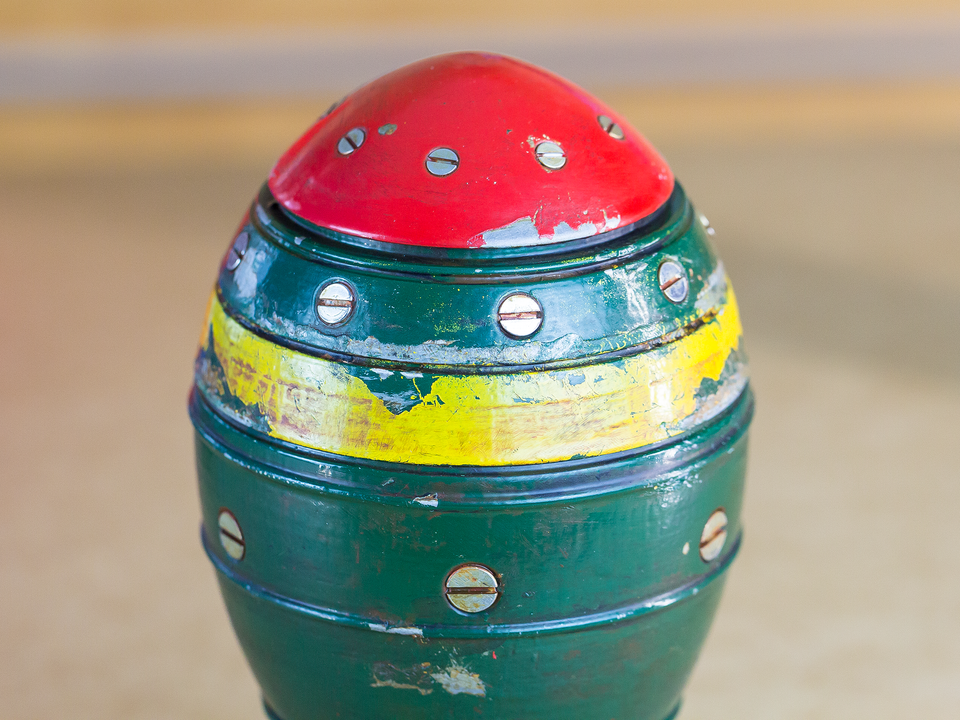
When finishing a 3D print by hand (sanding, priming, filling, etc.) you have more control over where to build up sharp corners and where to round edges. With vapor smoothing, you trade off that control for an all-around smoothing that happens a lot quicker. With acetone vapor smoothing or using the Polysher, try to pick models that don’t have sharp edges. If you don't mind the edges rounding over on your model - go for it! In my case, I really like Fallout and I can never have enough Fallout props on hand, so I went with a modified version of Daniel LilyGreen’s Mini Nuke (modified by PowerHobo) from Thingiverse. Considering that the “mini-nukes” from Fallout are supposed to be mass produced ammunition, all the features of it would be rounded over from manufacturing, just by virtue of metal fabrication, and because of that, it makes for a perfect print for the Polysher.
Preparing PolySmooth Filament
Something I’ve noticed is that PolySmooth seems to absorb water from the air. I printed a couple Phils in the white PolySmooth, and even though I printed immediately out of the box it seemed kind of fuzzy. It felt fuzzy in the same way that wet nylon prints feel, so I had a feeling it was wet. I printed a second one after the spool was left in a PrintDry, the filament storage and drying solution, over the weekend, and there was a significant difference in Phil’s glossiness and surface quality.
Printing with PolySmooth
Like I’ve said before, PolySmooth is a PVB filament, however it prints very similarly to PLA filament. In fact, when printing PolySmooth literally the only setting I change is print temperature. While PLA works well from 190°C to 220°C, PVB has a range of 210°C to 230°C, and I normally print at 220°C.
Using the Polysher
Once you have each part printed, you’ll need to do the actual smoothing in batches. The Polysher has a plate with a diameter of 5 1/2", so I was able to fit a lot of the smaller pieces in one batch, then the bigger pieces in on their own. In total, all the parts I had took 4 batches to get them all smoothed out. To prepare the Polysher is really easy; you raise the platform with the press of a button, lift up the shield, remove the cover of the reservoir, pour in your isopropyl alcohol, replace the cover, and replace the shield. From there all you have to do is place your parts, being careful that they don’t touch, otherwise they’ll stick to each other, and then lower them in. Each blue light on the dial represents five minutes, and for a large part like the main body of the Mini Nuke, 30 minutes is a good place to start.
All in all, while printing took 30 hours, and using the Polysher took 2 hours, I didn’t have to actively do anything. I could start the print or start smoothing, and walk away and do something else. I didn’t have to mess around with sanding and all the dust that comes with it, I didn’t have to mess around with noxious body fillers or putties, I didn’t even have to change my normal routine to get it completely printed and finished; all I had to do was press start, let it print, press start, and let it smooth.
Conclusion
This was a really satisfying project to work on, just because of how easy it is to get from filament to finished prop. Utilizing PolySmooth and Polysher is just another way that significantly lowers the barrier of entry into cosplay. That’s all there is to it! Hopefully this has given you some ideas about how you would incorporate this into your cosplay workflow, or maybe even it has inspired you to start working on props and cosplay altogether.
If you have any ideas or suggestions for a how-to, feel free to leave a comment down below. I’m Alec from MatterHackers, happy printing!
Request a Quote
To learn about available discounts, training, and maintenance options, please use the form below and a MatterHackers Expert will contact you within one business day. Alternatively, you can always feel free to give us a call at +1 (800) 613-4290 or email sales@matterhackers.com.